
How to perform VORTEQ™ vHIT
System setup
Before beginning your first vHIT for VORTEQ test, open System Default Settings from the main screen and select Head Sensor from the side panel. Ensure that the connection type is set to Bluetooth for best vHIT results. When the head sensor (IMU) USB receiver is plugged in and the IMU is turned on, the board status indicator should be green. To calibrate the head sensor for the first time, lie the IMU flat and click Calibrate Now. Make sure the sensor is completely still during this process. The calibration indicator in this screen will turn green when calibration is successfully completed. The Refresh Calibration Before Every Test option should be enabled.

Figure 1 - VORTEQ IMU head sensor setup
Performing the test
To begin testing, select vHIT for VORTEQ from your drop-down test menu and begin with the test for lateral canals.

Figure 2 Test menu for vHIT for VORTEQ
Attach the VORTEQ IMU to the goggle and turn it on with the toggle switch located on the top of IMU. You will see a flashing yellow light next to the ‘on’ indicator on the IMU and a message in the side panel of the software test screen indicating that the sensor is active and ready for testing.

Figure 3 - VORTEQ IMU attached to goggle

Figure 4 - VORTEQ IMU sensor ready message
If you have not already calibrated eyes in a previous test, it is recommended that you calibrate before starting the test. Refer to the calibration quick guide for additional details for calibration.
Once calibrated, select start from the side panel to begin the lateral test. A black dot will appear on the TV screen.
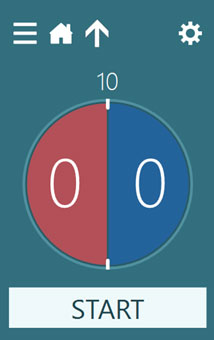
Figure 5 - Start VORTEQ vHIT test
The patient is instructed to keep their eyes focused on the black dot while the examiner performs the head impulses.

Figure 6 - Performing the VORTEQ vHIT test
The default is set for 10 impulses in each plane. You can use the Stop button to end the test early.
Results
During the test, you will see the eye movement tracings in red or blue, and the head movements tracings in grey. If the head movement peaks in the shaded area, that impulse will be accepted and added the final report. You can choose which eye is plotted using the drop-down menu located at top center of the vHIT tracings. This can also be changed in the summary screen for each canal pair.
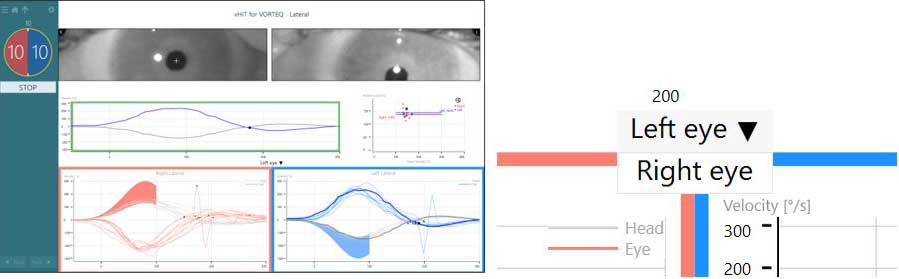
Figure 7 - Lateral head impulse test
For the vertical impulses, turn the patient’s head to the side and perform the thrusts straight ahead. Arrows marked as LARP and RALP are located on the top of the goggles just lateral to the focus knob. Position the patient’s head such that the arrow for the correct canal pair is directly pointed at the target on the TV screen.

Figure 8 - Guides for VORTEQ vHIT vertical impulses
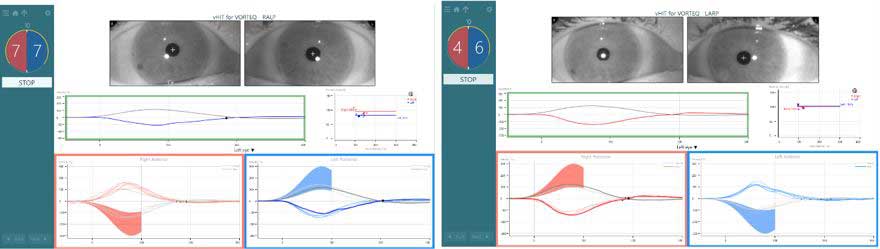
Figure 9 - Vertical impulse test screens
After each subtest is complete, the vHIT graphs for that canal pair will be displayed on the summary screen.

Figure 10 - Completed test summary screen
There are no threshold levels available for vHIT for VORTEQ tests.
Editing
You can edit the tracings by using the Edit Tools button to enter the editing screen. Here you can select multiple tracings to delete or show all the impulses.
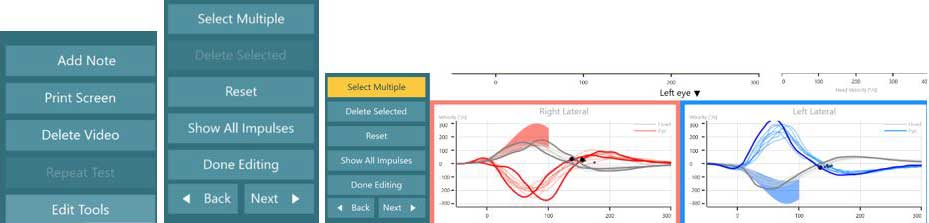
Figure 11 - Edit tools
You can see a single tracing in the upper graph. You can move the black dot to change the center crossing point for the gain calculation. By default, the software will place this dot for each trace at a point just prior to the first catch-up saccade to facilitate accurate measurement of gain. You can play the video using the video playback buttons. The dashed vertical line on the graph is linked to the timing of the video.
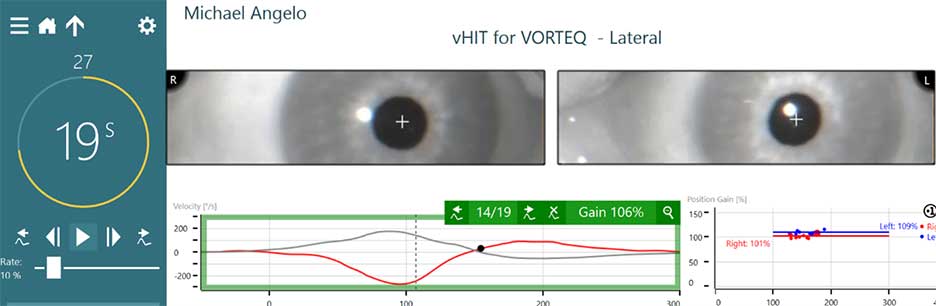
Figure 12 Edit single tracing and playback video
For best results, remember to charge the IMU in between patients using the USB cable provided with the system. If Bluetooth is not connecting or if the IMU is not charged, you may perform wired testing using the same cable. To do this, return to System Default Settings and change the head sensor connection type to USB.
For further assistance, please refer to the Instructions for Use and Additional Information manuals, which can be accessed from the question mark icon on the main screen in the VisualEyes™ software.
Presenter
