
Print Reports
Using the Print Wizard
In the Print Wizard you have the option to create customized print templates which can be linked to individual protocols for quick printing. The Print Wizard can be reached in two ways.
- If you want to use a template for general use, or select an existing one for printing: Go to Menu/ File/Print Layout… in any of the Affinity2.0 Suite tabs (AUD, REM or HIT)
- If you want to create a template or select an existing one to link to a specific protocol: Select the Module tab (AUD, REM, or HIT) relating to the specific protocol and select Menu/Setup/AC440 setup,Menu/Setup/REM440 setup, or Menu/Setup HIT440 setup. Select the specific protocol from the drop down menu and select Print Setup at the bottom of the window.
There is an additional quick guide to explain how to create a template, it is titled ‘Quick Guide –Customised Printout Setup’.
Now the Print Wizard window opens and shows the following information and functionalities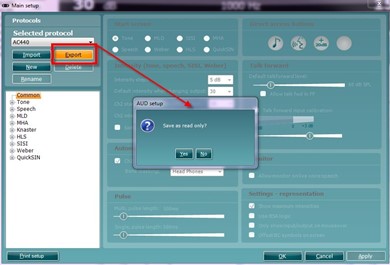
- Underneath Categories you can select
- Templates to show all available templates
- Factory defaults to show only standard templates
- User defined to show only custom templates
- Hidden to show hidden templates
- My favorites to show only templates marked as a favorite
- Available templates from the selected category are shown in the Templates viewing area.
- Factory default templates are recognized by the lock icon. They ensure that you always have a standard template and do not need to create a customized one. However, in order to edit these default templates, they need to be saved under a new name. User defined/created templates can be set to Read-only (showing the lock icon), by right clicking on the template and selecting Read-only from the drop down list. Read-only status can also be removed from User defined templates by following the same steps.
- Templates added to My favorites are marked with a star. Adding templates to My favorites allows quick viewing of your most commonly used templates.
- The template that is attached to the selected protocol when entering the print wizard via the AC440 or REM440 window is recognized by a checkmark.
- Press the New Template button to open a new empty template.
- Select one of the existing templates and press the Edit Template button to modify the selected layout.
- Select one of the existing templates and press the Delete Template button to delete the selected template. You will be prompted to confirm that you want to delete the template.
- Select one of the existing templates and press the Hide Template button to hide the selected template. The template will now be visible only when Hidden is selected under Categories. To unhide the template, select Hidden under Categories, right click on the desired template and select View/Show.
- Select one of the existing templates and press the My Favorites button to mark the template as a favorite. The template can now be quickly found when My Favorites is selected under Categories. To remove a template marked with a star from My Favorites, Right-click on the template and press the My Favorites button.
- Select one of the templates and press the Preview button to print preview the template on screen.
- Depending how you reached the Print Wizard, you will have the option to press
- Print for using the selected template for printing or press
- Select for dedicating the selected template to the protocol from which you got into the Print Wizard.
- To leave the Print Wizard without selecting or changing a template press Cancel.
Right clicking on a specific template provides a drop down menu offering an alternative method for performing the options as described above: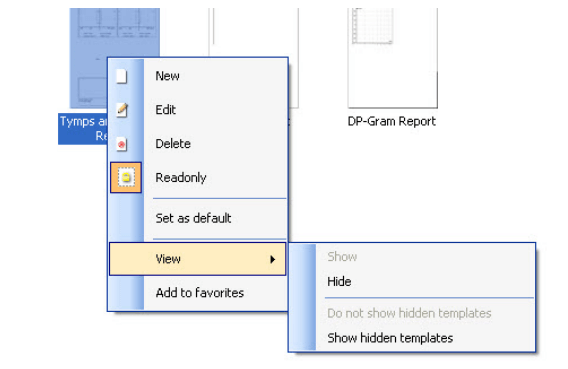
Further information on this can be found in the Callisto and Affinity Additional Information Guides.
Presenter
Interacoustics