
Customised Printout Setup
The Affinity 2.0 and Callisto™ software suites have the ability to allow custom print layouts to be created and used alongside the VIOT Suite and Titan Suite. This enables data from various tests to be combined into one convenient printout.
Creating a Custom Print Template
Opening the Print Wizard:
-
Open the Affinity 2.0 or Callisto™ Suite from your patient management system, Noah, OtoAccess™, or stand- alone.
-
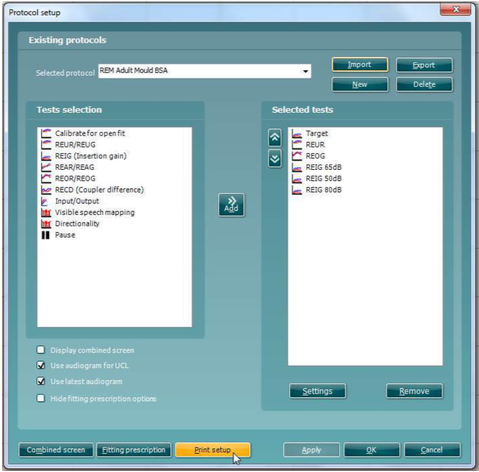
You can access the setup for protocols from any of the AUD, REM or HIT (Affinity 2.0 only) tabs.
-
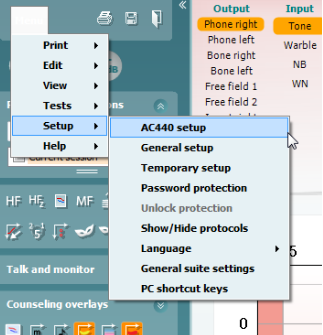
Press, Menu, Setup and then AC440 Setup (or REM440/HIT440 depending on which module you are in). Performing this action will open a new window.
-
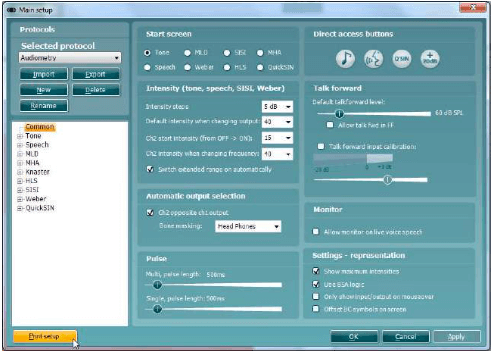
In the new window you will find Print Setup in the bottom left corner. Please press this to open the Print Wizard.
Designing a New Customised Print Template
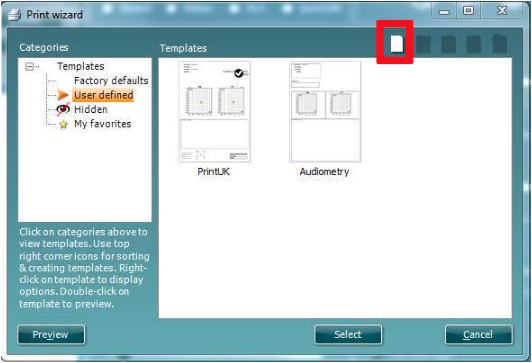
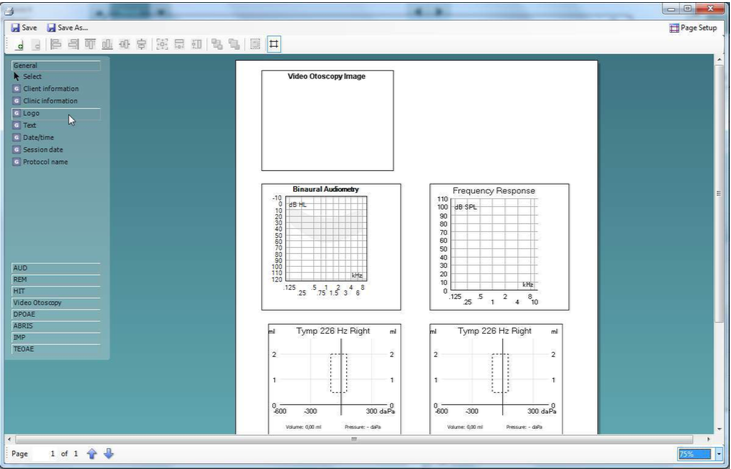
- Now that you are in the Print Wizard you will see the below screen:
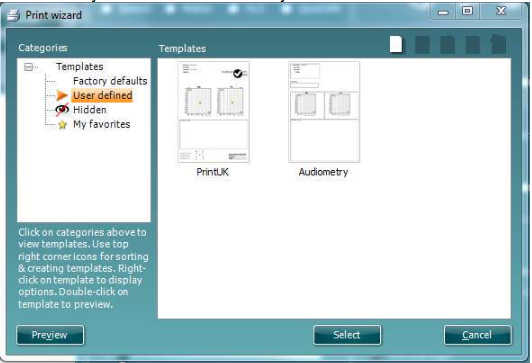
This screen is further clarified by the quick guide titled; ‘Quick Guide – Print Report’. -
Click on the blank page in the top right of the screen to create a new print layout. This action will open a new screen. You can alternatively right click on an existing print layout and select Edit to continue building it.
-
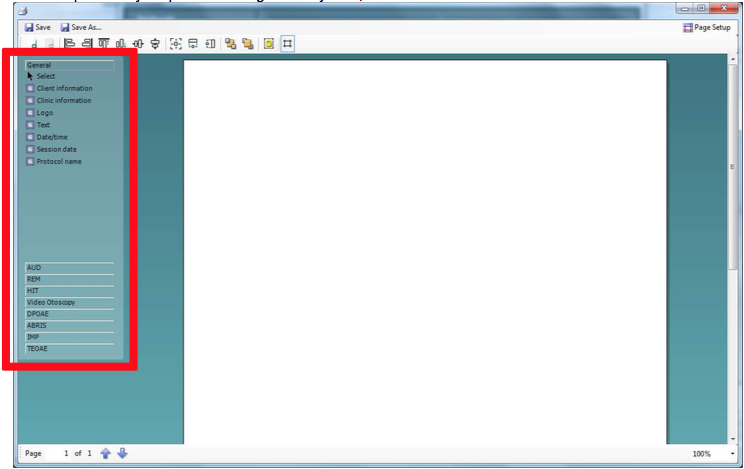
Once in this new screen you will see the elements which you can add to the layout on the left of the screen. These are ordered by their corresponding test module, for example everything to input into the print template to do with the AUD module can be found under AUD.
All of these elements are able to populate on printing should the patient have these test types assigned to their profile in your patient management system, Noah or OtoAccess™.
-
Please select an object from the left to draw onto your page. In this example I am using an Audiogram. Once Audiogram has been clicked you will need to draw it to your desired size onto the page.
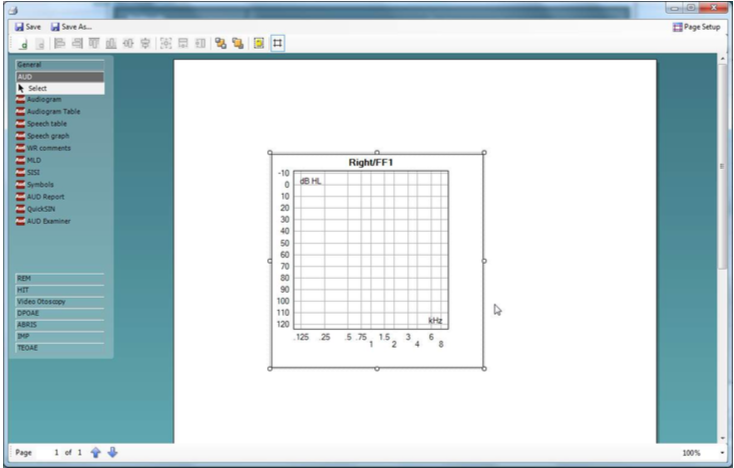
-
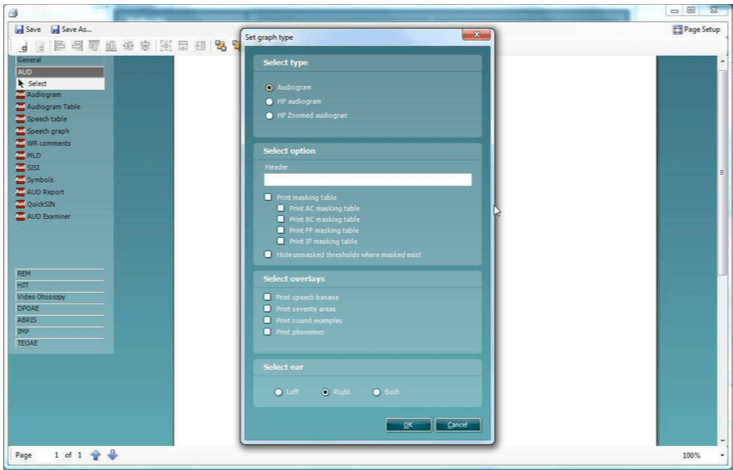
Once drawn you will be able to move it to your desired position and also right click to define the parameters of what information it displays. For example, in this instance right clicking on the object will allow you to ‘select type’, clicking on this will open a new window which will allow you to define options such as the test ear and include sound examples etc. Every object you input allows for customization of the options the element can display, and the options available to each can vary depending on the module element selected.
Also, when right clicking on an element you have the options to rotate that element and also toggle the surrounding border.
-
Once you have clicked in all of your elements and have configured them to your preference you will need to organise them. This can be done by moving them to their desired position and sizing them similarly also. There are a few tools to assist you with this. If you left click on an element you will notice the highlighted tool bar below become active. The options available to you’re here are purely for ordering (ex: to send items backward/forward).
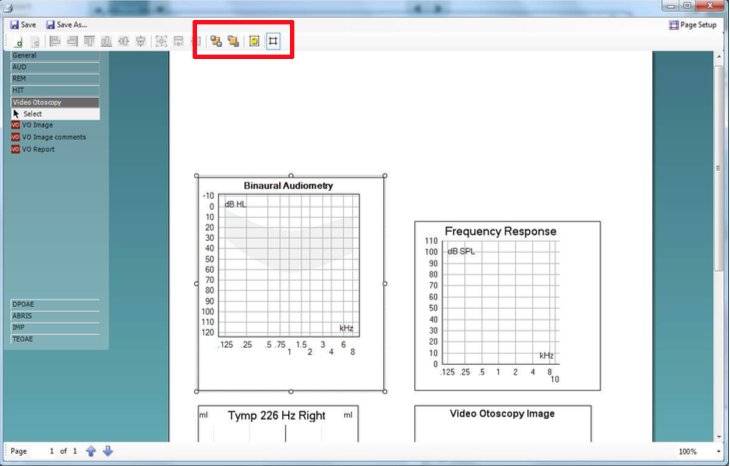
-
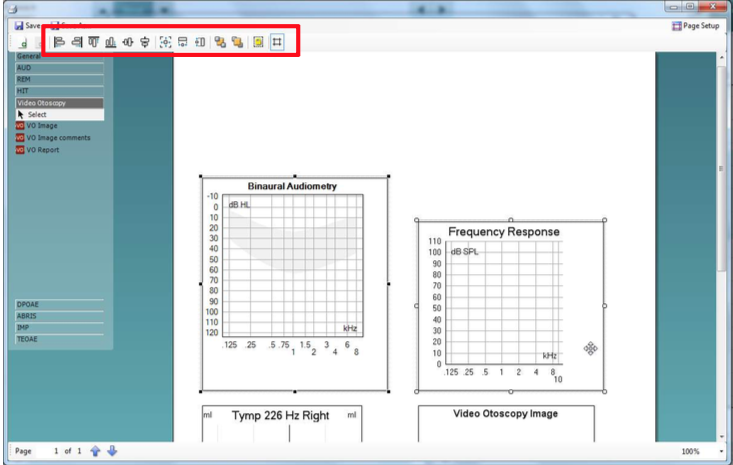
However, if you left-click on one element and then hold Control on your keyboard and left clik on another you will then be able to activate the rest of this tool bar. This opens up the sizing and alignment options to you. Hovering your cursor over each icon in this toolbar will explain its function.
These settings make it easier to match the sizes of the elements you have added to your print template.
I have performed the ‘make equal size’ option below as an example.
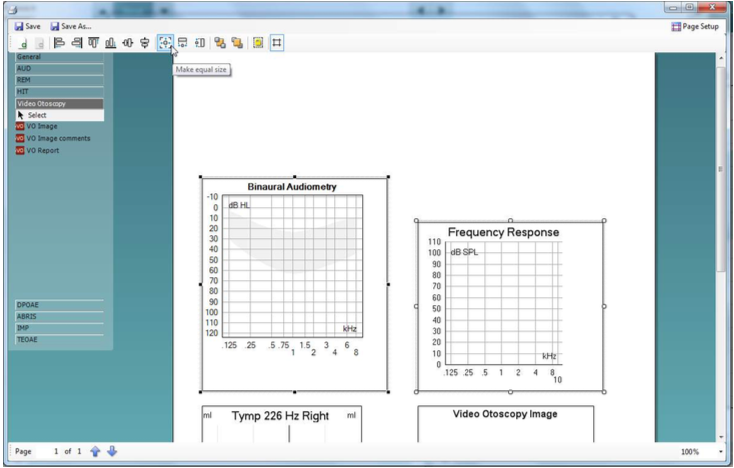
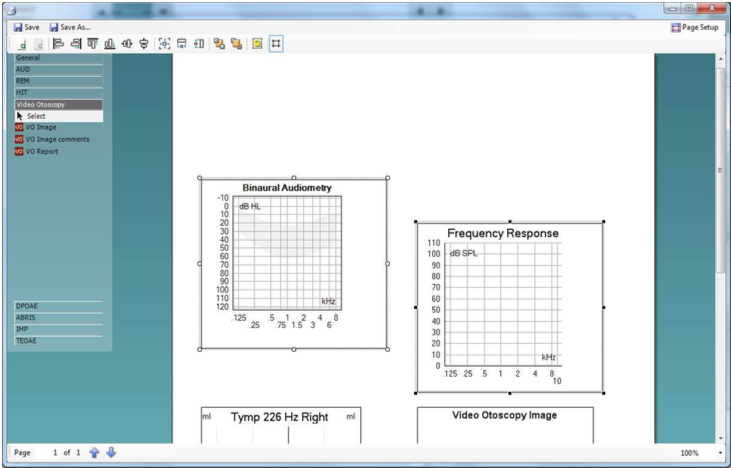
Notice how the first element clicked is taking settings (size) from the second element. -
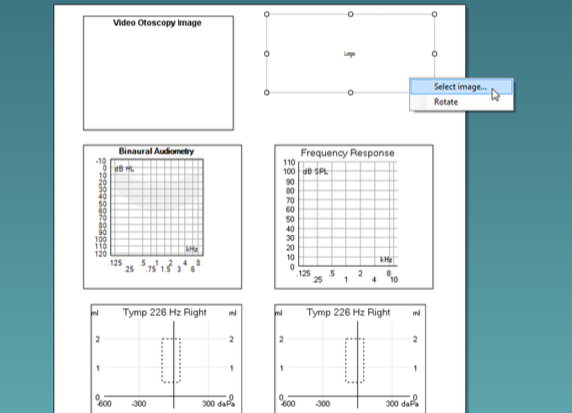
Continue to click and add further aspects of your print template to your preference. Once completed you can add information on your clinic (via a blank Test box) and even a logo. This can be done via the General sub-tab on the left of the screen.
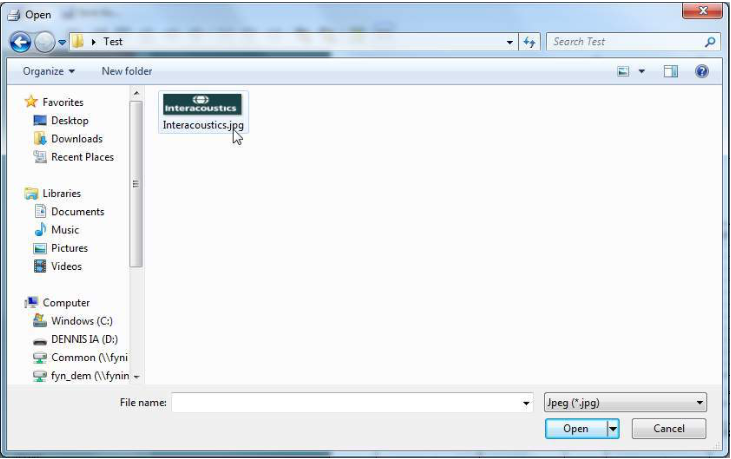
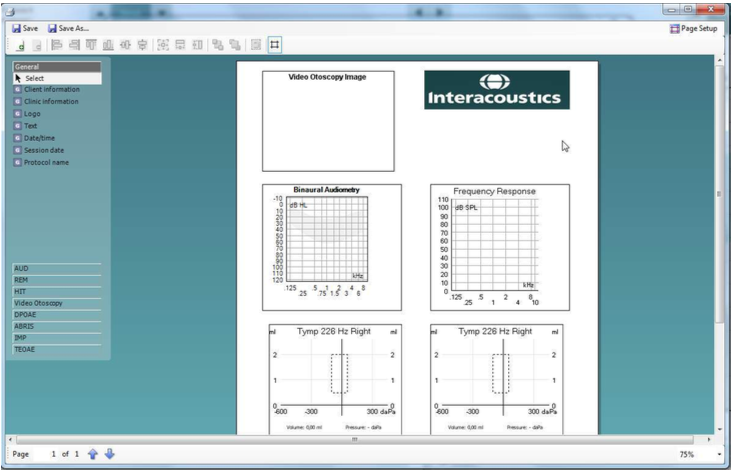
Drawing a logo element will allow you to create a section on your print template for which you can import a .jpg file. To do this, right click on the element and click Select image... This will open the system dialogue where you can navigate to the image that you wish to input. Please note that the Print Wizard only accepts .jpg and .png format image files.
-
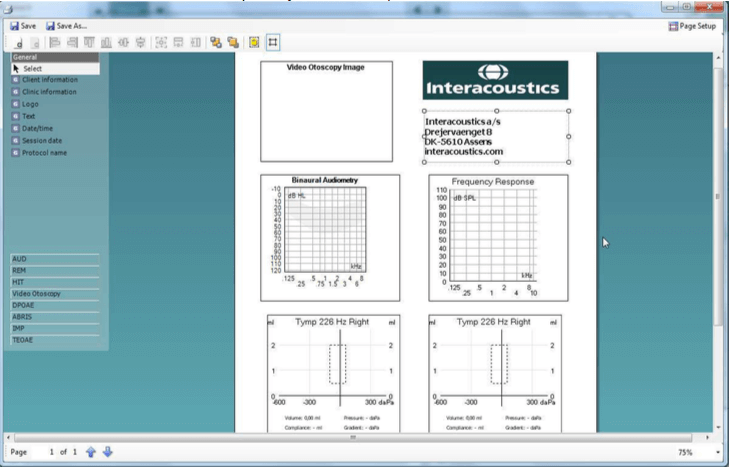
Finally I will add a text box below the logo to show the sites address and contact details.

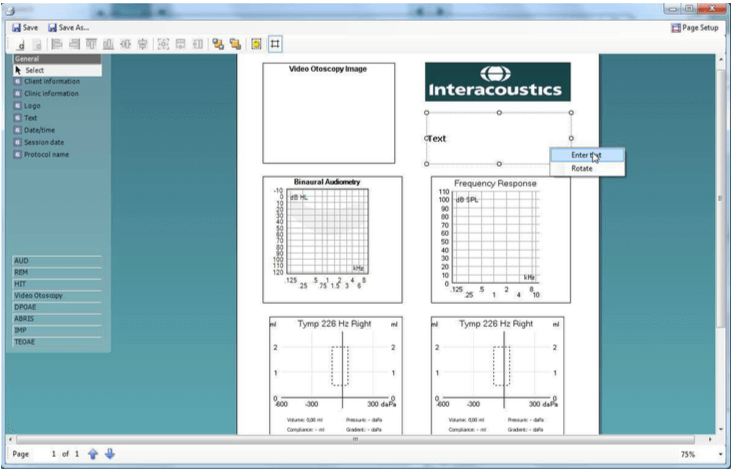
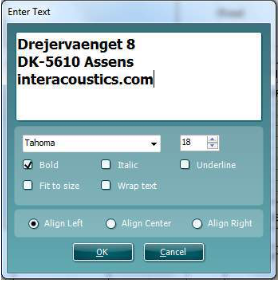
You can also alter the font and formatting of the text and how it will appear on your print layout in this section. This text box will be common to this print layout when it is printed from in the future.
Saving your print template
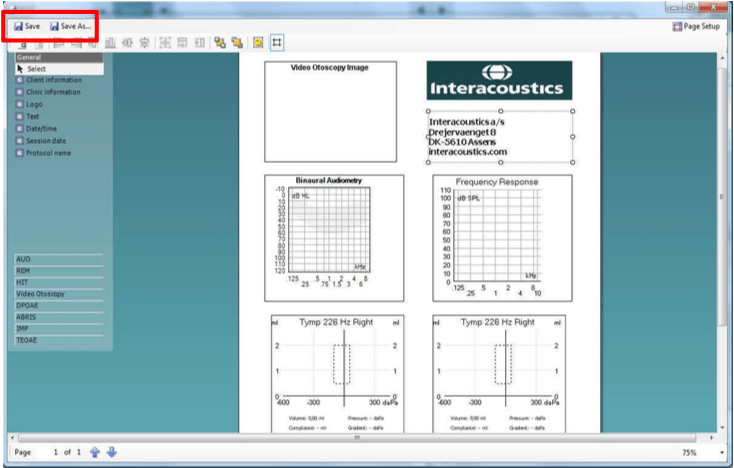
- Now that you have completed your print template and have designed it to your preference and requirements you can click on Save or Save As... in the top left of the screen.
-
As this is a new print layout Save will perform the same action as Save As... and a small window will appear requesting you to title your print layout.
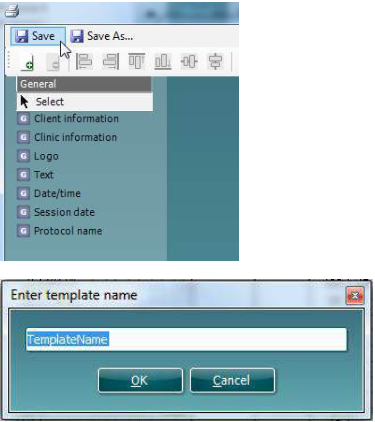
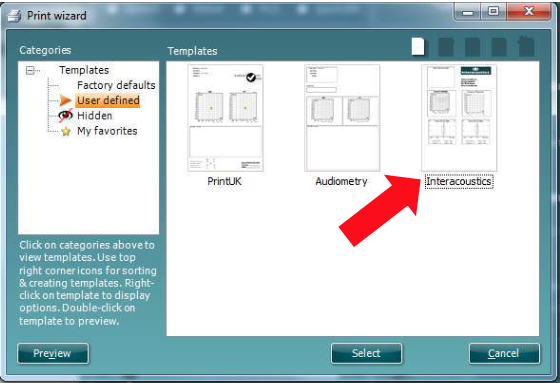
Once you have titled this layout and Ok is clicked it will appear in your Print Wizard as a new layout.
Please see the Quick Guide titled ‘Quick Guide – Print Report’ on how to set this as a default or a favorite. Should you require additional information on this then please see the Affinity 2.0 and Callisto™ Additional information guides.