
Hearing Instrument Testing
NOTE: Hearing instruments need to be in FULL ON GAIN MODE/TEST MODE in order to compare the results to the hearing aid manufacturers’ technical data sheets. Each hearing aid manufacturer has a different way of accessing this Test Mode. Please check with the hearing aid manufacturers for instructions on how to program the hearing aid into TEST MODE.
- Launch the Affinity Suite from your patient management system, Noah or OtoAccess®.
- Click on the HIT tab to launch the HIT440 module.
- If comparing to manufacturers’ technical specification, ensure that the hearing aid is in FULL ON GAIN MODE.
Setup
1. BTE hearing instrument
Required Items:
- The Affinity2.0 hardware.
- The Affinity Suite with the HIT440 module.
- A coupler microphone.
- A coupler (most common is 2cc coupler).
- The BTE Adaptor for the coupler.
- The reference microphone (included in Affinity2.0 test box).
- Earmold Tubing to connect the hearing instrument to the BTE adaptor/coupler.

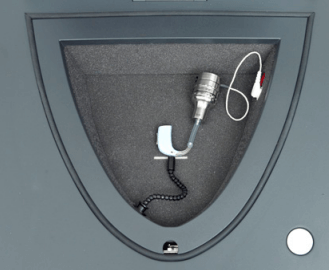
Positioning the BTE in the test chamber
Place the coupler tube pointing straight forward and the microphone at the cross. (Multiple microphones: Place the half-way point between the microphones at the cross).
2. ITE/Open Fittings/Receiver in the ear
Required Items:
- The Affinity2.0 hardware.
- The HIT440 software.
- A coupler microphone.
- A coupler (usually 2cc).
- An ITE adaptor for 2cc coupler.
- A reference microphone.
- Blue putty to secure the hearing instrument to the 2cc coupler.

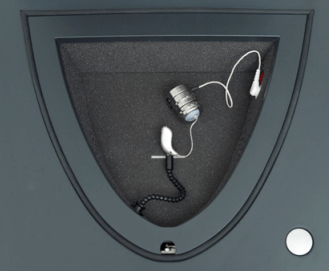
Positioning the ITE hearing instrument
Place coupler at the back with hearing aid facing forward and the microphone at the cross. (For multiple microphones, rotate the hearing aid to get equal horizontal positioning of the mic inputs). Connect the ITE adaptor to the 2 cc coupler and attach the hearing aid using blue putty.
ITE pick-up coil test: For this particular test only: Position the coupler for maximum sensitivity of the coil.
Positioning the Open Fit/Receiver in the ear hearing instrument
Connect the ITE adaptor to the 2 cc coupler. Remove the tip/dome from the hearing instrument and attach it to the ITE adaptor using the blue putty. Place the coupler tube pointing straight forward and the microphone at the cross.
Test procedure
- Position the hearing aids and reference microphone as shown in the pictures above.
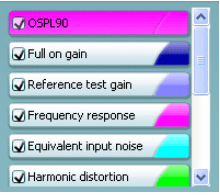
- Select the desired test protocol in the List of Protocols
- Select Test Ear.

- Select START

- Please wait for all tests of the selected protocol to be performed.
- Save by clicking “Save” icon

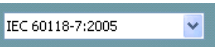
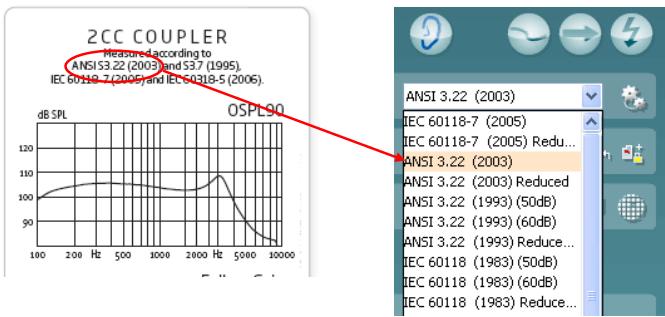
Comparing to the manufacturers specification sheets
Most hearing aid manufacturers use known international standards, such as the ANSI or IEC for their specification sheets. The same standard can usually be selected in the HIT440 software.
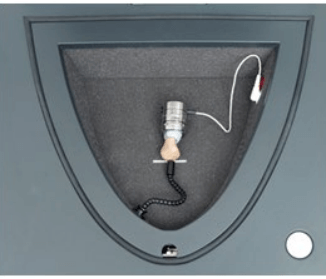
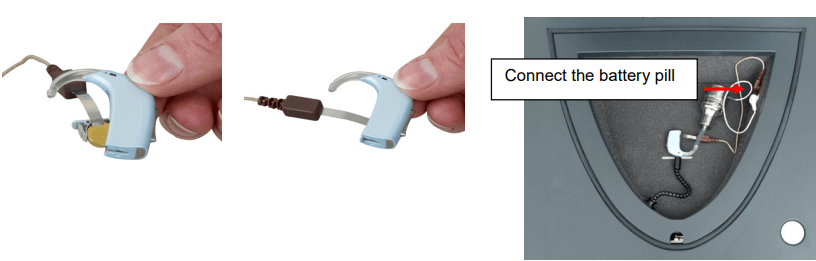
Testing for battery drain
- Insert the battery pill inside the hearing aid (example below).
- Connect the battery pill into the red socket in the Affinity2.0 test chamber.
- If the test is included in the test sequence, it will be measured automatically.
For more information on HIT440, please refer to the Affinity2.0 Additional Information document.