
REM440 Protocol Setup
This quick guide is intended to give a brief introduction on how to work with, create or edit protocols in the Affinity Suite.
The Affinity Suite has pre-defined protocols. Most of these protocols can easily be copied, modified or created from new. These modifications can be either permanent or temporary.
Working with protocols
Selecting a standard test protocol
- Open the Affinity Suite from your patient management system, Noah, OtoAccess®, or stand-alone.
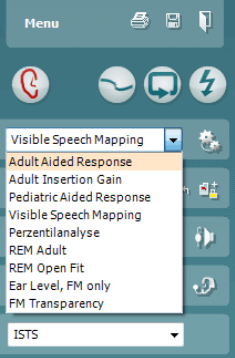
- Click on the REM tab
- In the List of Protocols, all customized and standard test protocols are listed.
Designing a New Customised Test Protocol
- Enter the REM440 setup by pressing Menu/Setup/REM440 setup.
- Press New. A pop-up will ask whether the new test protocol should be based on a copy of the currently selected test protocol. When asked by the message box:
YES: The system will create a copy of the current test and allow you to add new tests, make changes, and save it under a new name.
NO: The Selected tests section will be blank and you can create a new test from scratch.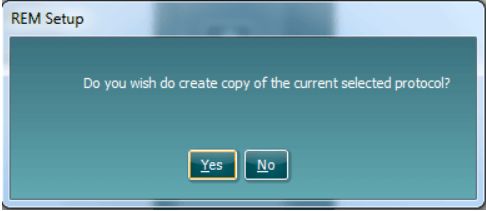
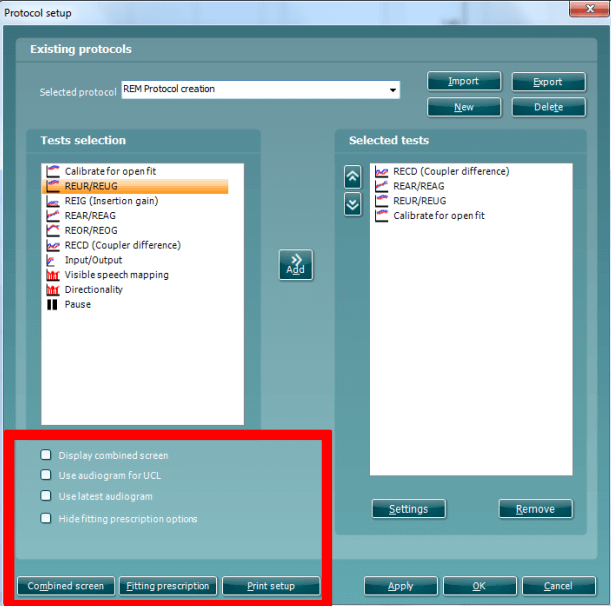
- Name the test protocol setup in the Selected protocol section.
- Select the tests to be included in the test protocol. Mark a test by clicking on it and press the Add. Double clicking on a test will also select it. Choose all the tests for the test protocol using this procedure.
- To remove a test selected by mistake, select it under Selected tests and press Remove. The test will then jump back to the Test selection list.
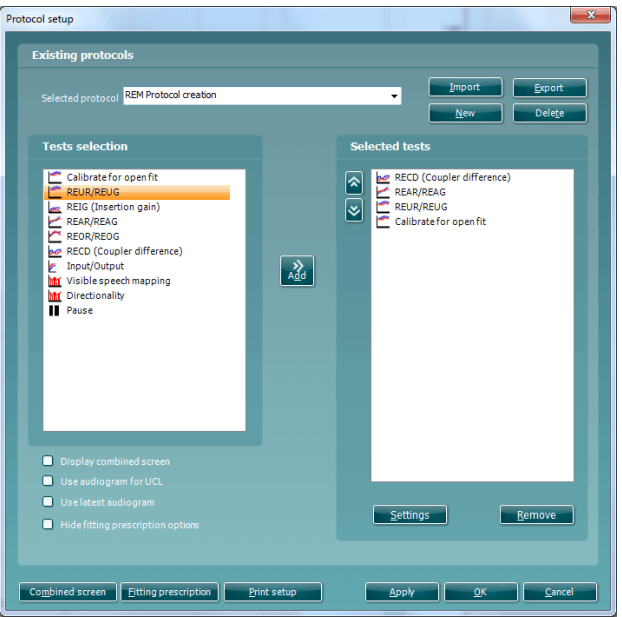
- If the order of the tests is to be changed, use the two Move arrow buttons.
Mark the test to be moved and press one of the arrow buttons. Depending on the direction of the selected arrow, the test will then jump up or down. - To make adjustments to the parameters of each selected test press Settings. This will open a new window similar to below
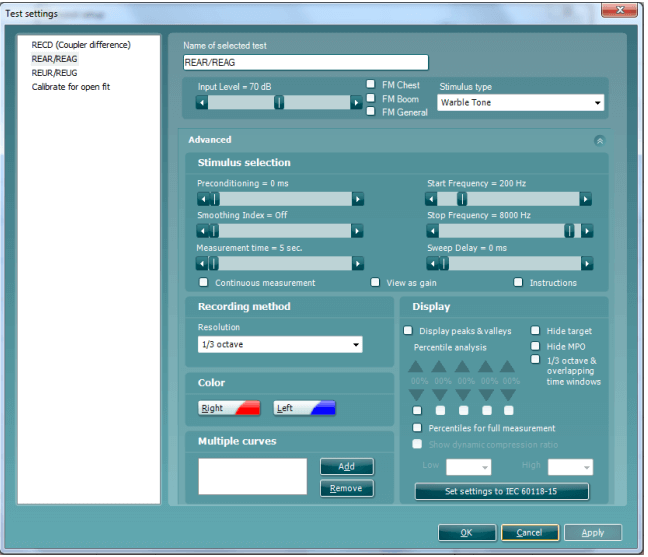
In this window you can manipulate your individual parameters which relate to the test within your test battery including renaming, input level, stimulus type, curve smoothing index etc. Once you have set and are happy with this, please click Apply to save and keep the screen open or OK to save and Exit. Pressing Cancel will exit the window and discard your amendments - You may also notice that in the bottom left corner of the Test settings window that there are additional settings (see below). These settings can help you to define how you want your software to be displayed and how curves are grouped via the Combined Screen section. You can also default your REM protocol to select the most recent Audiogram here. Finally, your prescription settings can be defaulted in this section by clicking on Fitting Prescription.
Note: Prior to creating a new test protocol you may wish to select a protocol type in the Protocols to view dropdown list. This function is practical if you for example wish to create a new protocol based on elements from a pre-existing protocol prior to creation. When asked if the new protocol should be based on a copy of the currently selected protocol, click yes. See step 2. above
Importing and exporting test protocols
The REM440 also allows you to import and export test protocols to other REM440 users.
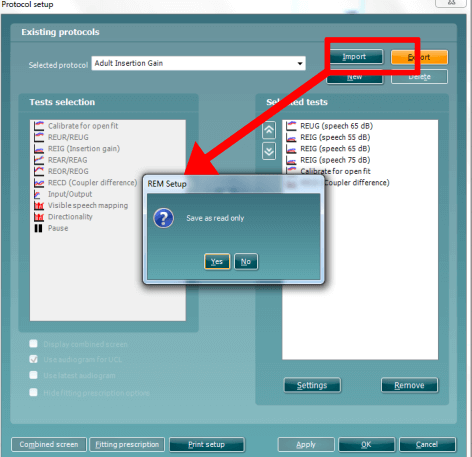
Exporting a Test Protocol
- Go to the REM440 Setup (Menu | Setup | REM440 setup).
- Click on Export.
- Select if the file is to be saved as “read only”. In this case the protocol file is locked and the clinician receiving it will not be able to make changes to it.
- Browse for the location on the PC or USB where the test protocol is to be saved
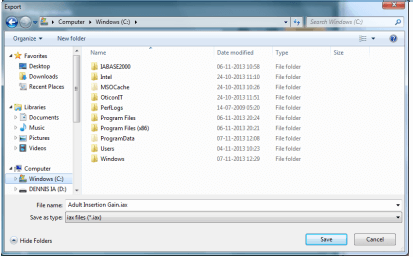
Click Save. Other REM440 users will now be able to upload the test protocol using the Import function
Importing a Test Protocol
- Go to the REM440 Setup (Menu | Setup | REM440 setup).
- Click Import and browse to the location on the PC or USB where the test protocol file has been saved.
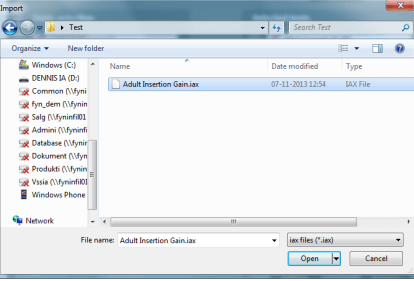
- Click Open.
- The test protocol will then appear under Name.
- After saving it by clicking OK the test protocol can be selected in the List of defined protocols in the front screen.
NOTE: If the protocols were exported as “Read Only”, imported protocols will not be able to be edited.
Presenter
Interacoustics