
How to Perform the SkiVR Module
This quick guide provides information on how to perform the SkiVR module on the Virtualis StaticVR and MotionVR solutions. For additional information, please reference the SkiVR user manual.
Equipment needed
To view the equipment needed, click on the “i” icon in the upper right corner of the module.
To perform the SkiVR module, you will need the StaticVR or MotionVR. The VR headset is optional for this module, however if you do not use the VR headset you will need a secondary screen to perform in “Screen Mode.”
Patient setup
The patient will need to be standing to perform this module.
1. Open a patient profile.
2. Click on “Start a session” to access the module list.
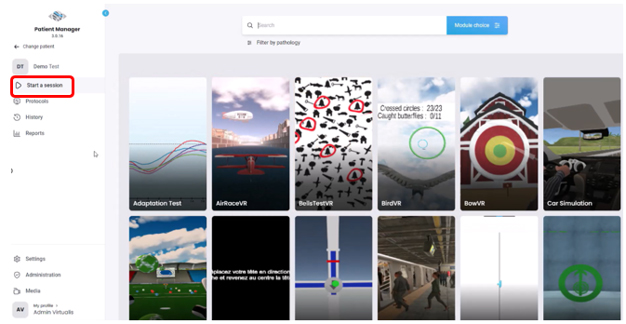
3. Type “SkiVR” in the search bar. The first three letters are often enough.
4. Click on the SkiVR button to launch the module.
5. Select the initial settings based on your patient’s therapeutic goals.
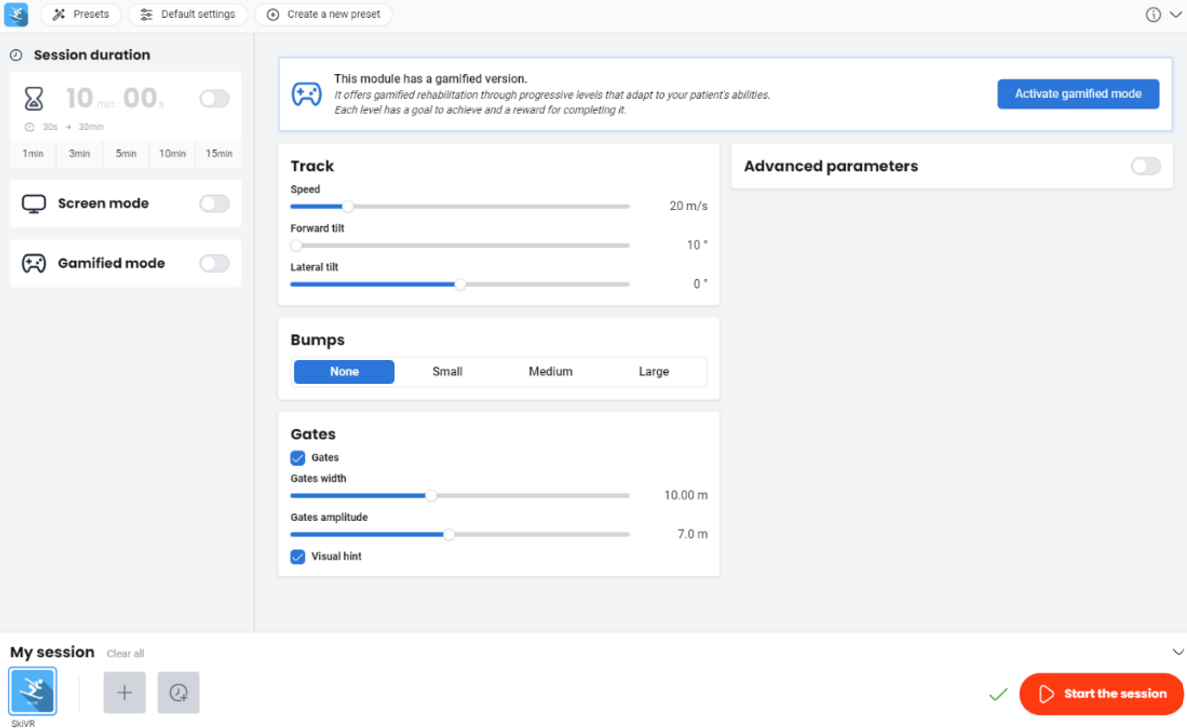
- Session duration: choose a preset time option or create your own value.
- Track
- Speed: scrolling of the environment. Value: 5 to 100 m/s.
- Forward tilt: modifies the track’s tilt. Value: 10 to 30 degrees.
- Lateral tilt: modified the track’s tilt. Negative values are left, positive values are right. Value: -24 to 24 degrees.
- Bumps: option for bumps by choosing a preset. Note: when using the MotionVR, the force plate will move according the to the bumps selected.
- Gates: option for ski gates.
- Gates width: Value 3 to 20 m.
- Gates amplitude: distance between gates. Value: 0 to 15 m.
- Visual hint: option for green arrow to point to the gate location.
- Advanced parameters
- Environment: option to change the environment conditions including whiteout, make skier’s body visible, falling snowflakes or simplified environment.
- Bumps: option to change bump settings including height and length.
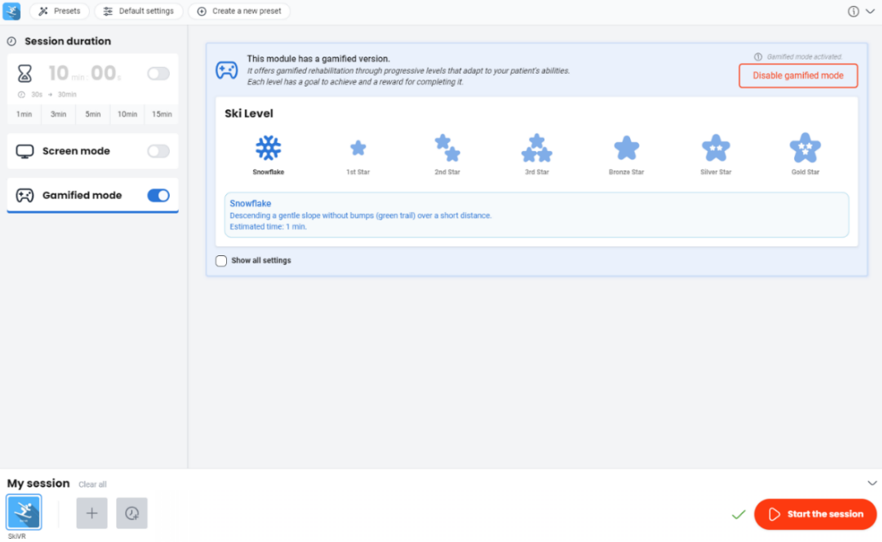
- Gamified mode: gamified rehabilitation through progressive levels that adapt to the patient’s abilities. Each level has a goal and reward.
-
- Ski level: progressive difficulty options that can be selected according to the patient’s goals. As the patient achieves the goal for each level, they will advance to the next level during the module.
- Snowflake
- 1st star
- 2nd star
- 3rd star
- Bronze star
- Silver star
- Gold star
- Show all settings: ability to modify additional settings including the track, bumps and advanced parameters.
- Game: ability to change goal parameters including distance, required score, pause duration between levels and option to progressively move through levels.
- Ski level: progressive difficulty options that can be selected according to the patient’s goals. As the patient achieves the goal for each level, they will advance to the next level during the module.
6. Once settings have been finalized, click on “Start the session” in the lower right corner.
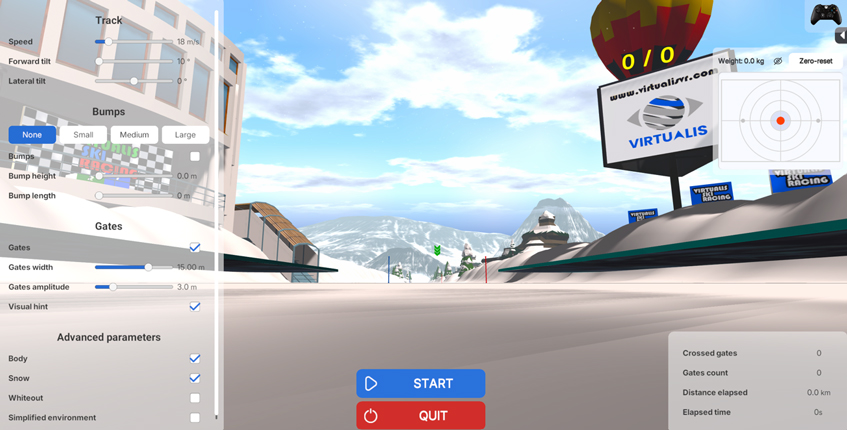
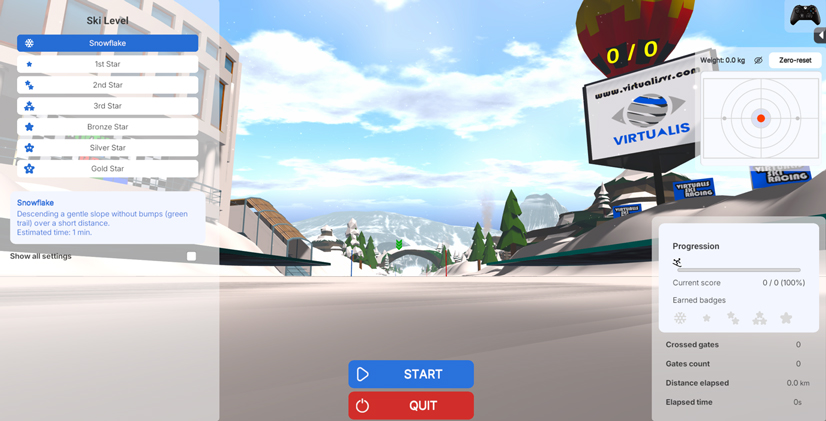
7. If using the VR headset, have the patient look forward and press “C” on the keyboard to center the image inside the VR headset before starting the module.
8. Instruct the patient that the goal of the module is to move their weight side to side to ski down the hill and pass through the ski gates.
9. Press “Start” to begin the module.
10. Perform real time progressions by changing the parameters on the left and right sides of the clinician screen (see below). Patients cannot see these adjustments. In general, increasing the speed, tilt, bumps level and increasing amplitude on the MotionVR or decreasing gate width and amplitude or adding visual conflict to the environment will increase the complexity of the task.
11. Click the Xbox remote icon in the upper right corner to view information about shortcut keys.
12. When the module is complete you can view the results by clicking on the histogram icon.

- Default data points: number of gates crossed, total number of gates displayed, distance elapsed, ski levels achieved (gamified mode option).
- You can also access additional results by clicking “Chart options”.
Presenter
Cassie Anderson PT, DPT
Global Clinical Educator for Balance Rehabilitation, Interacoustics A/S Cassie holds her Doctorate in Physical Therapy and has served as a licensed physical therapist for 11 years. She began her career in the inpatient rehab setting working primarily with patients post stroke then transitioned to the outpatient setting working primarily with the vestibular/balance population in a multidisciplinary ENT and neurology clinics. Cassie has participated in research and quality improvement projects aimed at incorporating technology into clinical practice and has presented at both the national and international level.