How to print without a database
There are 3 options for printing without a database on the AD226 diagnostic audiometer. Please note that Interacoustics’ Diagnostic Suite allows for upload onto the computer, it is not a database.
Please remember that in addition to the below, instructions for printing are always contained in your equipment manuals.
Option 1: Set your printer to default PDF print
To do this, navigate to your computer system’s printer and scanner’s folder. The easiest way to navigate to this is by typing in ‘printer’ into the search bar on the bottom left-hand corner of your computer (Figure 1).

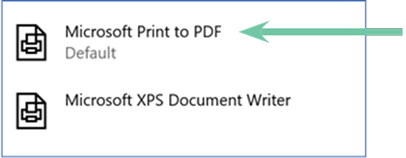
Once you are in your settings, you can click on ‘Microsoft Print to PDF’ (Figure 2) and then select ‘Set as Default’.

After you have opened your Interacoustics software and uploaded or performed your test, you can click the Print icon (Figure 3), and the PDF save option will automatically appear.

You will now save the file as your Patient name (and/or any other identifying information you choose for this patient) to your chosen computer location. The PDF is then ready to be uploaded into the third-party software.
This is the quickest and easiest method for saving results to PDF. Please note that no patient information is contained on the printed form in this fashion, only the electronic file name.
To have client details on the printed form, you need to perform Option 2.
Option 2: Use a dedicated print layout to print client details
When testing in the Diagnostic Suite or after you have uploaded your results into your Interacoustics software, you are able to enter patient details into the comments box, located on the left-hand menu at the bottom (Figure 4).

By clicking on the white box, you are able to type in notes. This should include Patient Name, ID, Date of Birth, and any other identifying information you wish to print out on the client test results.
Once finished, you are now ready to print the results, either to PDF as provided in Option 1, or to hardcopy.
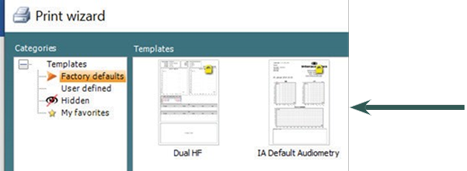
Go to Menu/Print/Print Wizard/Factory Defaults. Here you need to ensure that you are selecting a print layout which has the AUD report (Comments) included.
Suggested layout to use: 'IA Default Audiometry' (Figure 5).

Click on this option and then “Print” in the bottom right-hand corner.
The default computer printer will be chosen to print the layout. Either hardcopy, or PDF if you have performed Option 1.
Option 3: Create a customized print layout
Your Interacoustics software already comes with preloaded print layouts. However, they may not be the layout you desire. It is possible to create your own design. The full instructions for designing your own from scratch is outside the scope of this quick guide, but you will find all the necessary instructions in your manual to complete this task, if you wish.
To get you started when you are ready to print, go to Menu/Print/Print Wizard and click on the white box in the top right-hand corner to create a new template.
You can now add all the necessary items to your layout as you wish (Figure 6).

Typical items to add:
- Logo
- Session date
- AUD report
- Audiogram
- Symbols
You can add as many other items as you wish. Simply adjust the boxes to size and your desired layout. There are many options to choose from, so you may wish to check how it looks and go back and change it as necessary.
To adjust the parameters for each box, simply right-click on the individual boxes and choose your options. This includes uploading your logo, selecting how to display the Audiogram (both left and right ears together), changing the header names, and so forth.
Click ‘Save As’ and name your print protocol.
When you wish to print, select Menu/Print/Print Wizard.
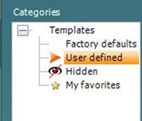
Select ‘User defined’ protocols on the left (Figure 7), and click on your design, then on “print” in the bottom right-hand corner.

